Table of contents:
â— Introduction
â— Create an ASP.NET Core MVC project in Visual Studio
â— Make database
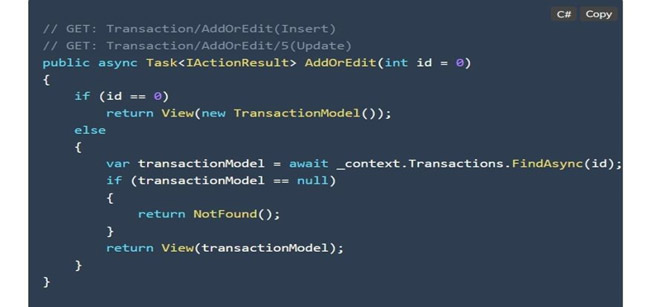
â— Create an MVC Controller that has CRUD Action Methods
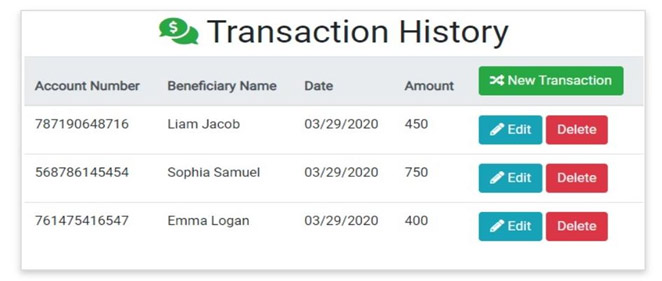
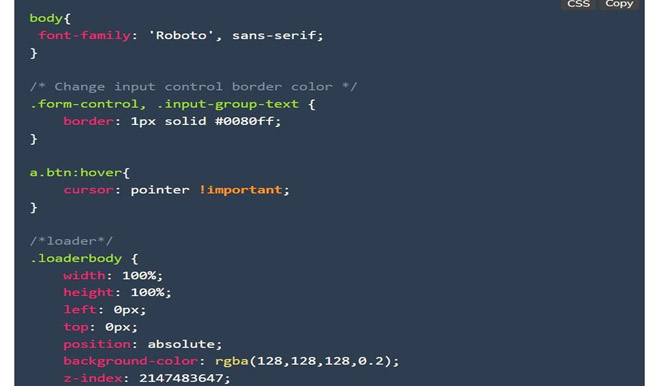
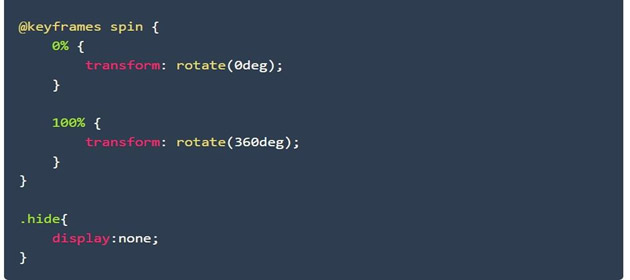
â— the app design
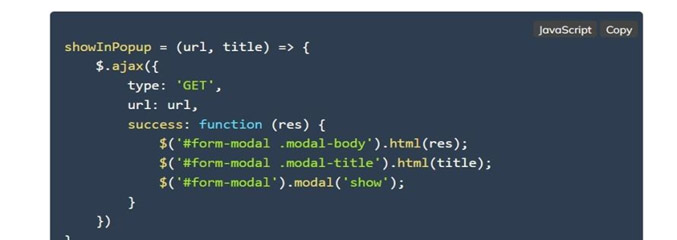
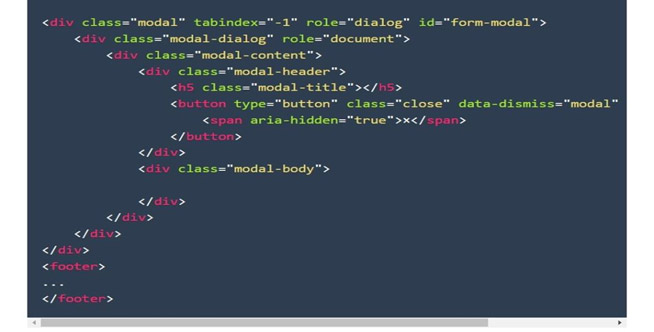
â— In ASP.NET MVC, how do you do jQuery Ajax Form Post?
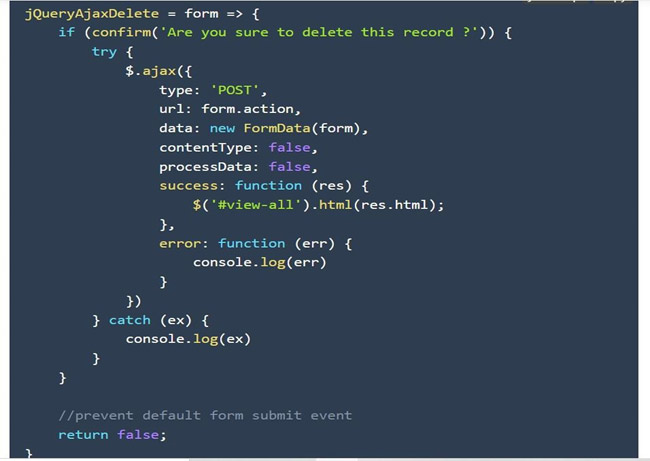
â— Using jQuery Ajax, you can delete a record.
â— Conclusion
Introduction:
When you use jQuery Ajax to implement CRUD operations, the whole webpage is loaded up for each user request. We can make HTTP requests to controller action methods using jQuery Ajax without resetting the entire page, similar to a single-page application.
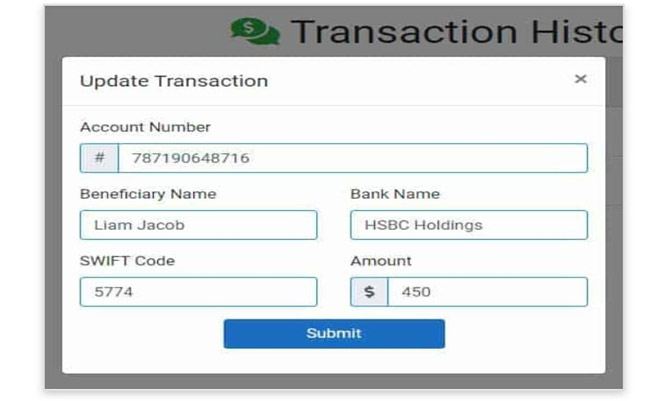
Similar to a single-page application built with front-end frameworks such as Angular or React, this provides better performance and lower bandwidth usage. The project was created to demonstrate CRUD operations (insert, update, delete, and retrieve). Will deal with the specifics of a typical bank transaction.
Now step by step, we will be discussing the jquery ajax in asp.net with the use of a modal popup.
Create an ASP.NET Core MVC project in Visual Studio.

Visual Studio 2019 is a new version of Visual Studio. (Ctrl + Shift + N) Go to File > New > Project.
Select Asp.Net Core Web Application from the new project window.
Once you've given the project a name and a location, you're ready to go. Uncheck HTTPS Configuration and select Web Application(Model-View-Controller). The steps above will generate a new ASP.NET Core MVC project. For Candidates who want to advance their career,
jQuery training is the best option
Make a database
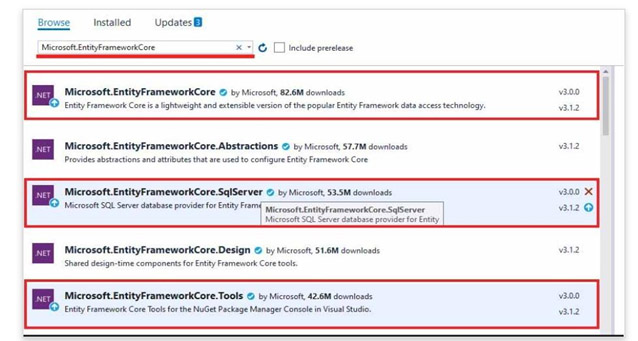
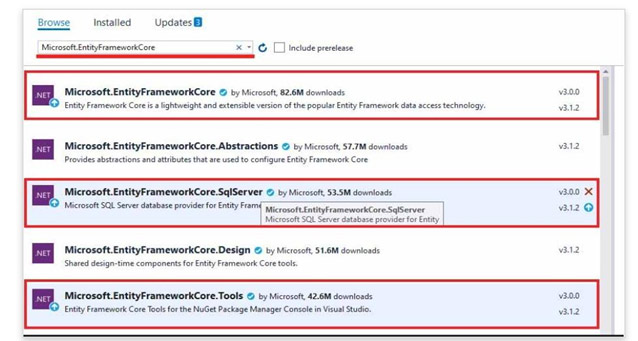
Let's use Entity Framework Core to create a database for this application. To do so, we'll need to install the necessary NuGet packages. From the solution explorer, right-click on the project, select Manage NuGet Packages, and then install the following three packages from the Browse tab.
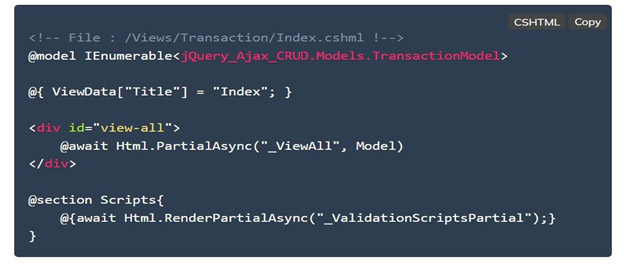
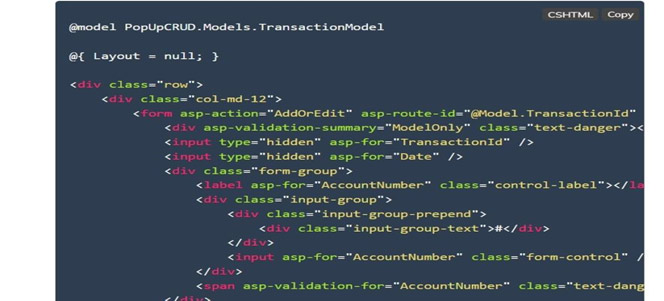
Now we'll create a DB model class file called /Models/TransactionModel.cs.
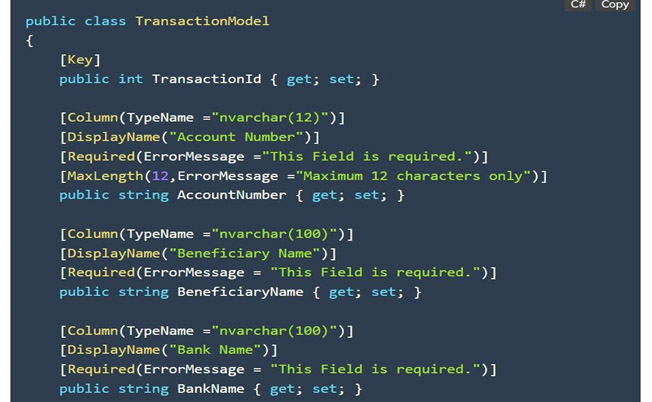
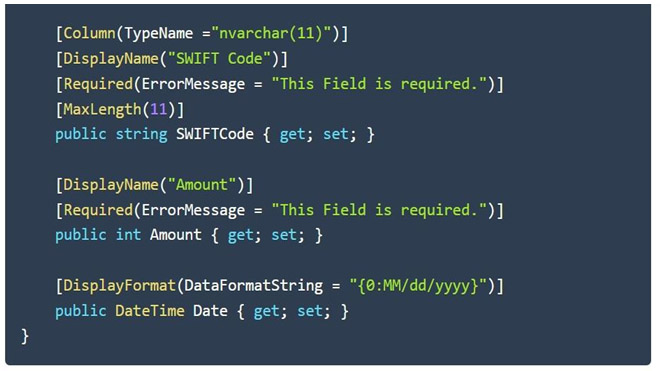
For the transaction, we've characterised model properties with proper verification. Let's create the DbContext class for EF Core now.
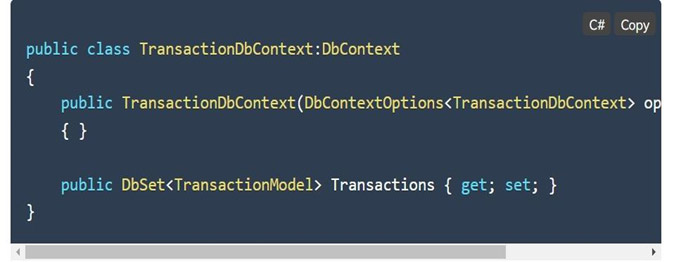
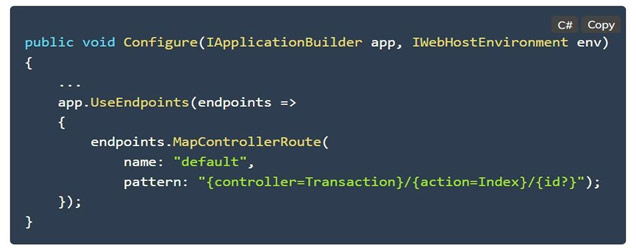
This class determines what should be in the physical database after migration. We decided to add a corresponding DbSet property – Transactions to the above model to create a table – Transactions. We'll be creating new instances of the DbContext class with ASP.NET Core dependency injection, which we can do in the Startup.cs file as shown below.
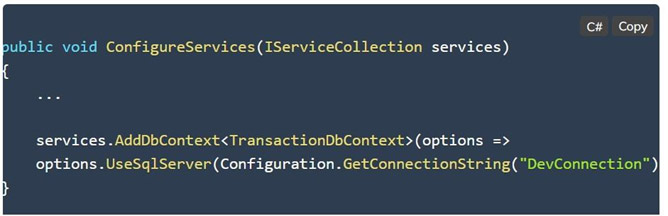
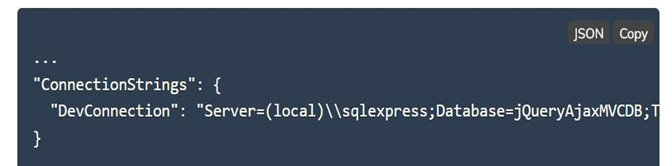
The value of the function Object() { [native code] } parameter is required when creating the class instance. The database provider (SQL Server, MySQL, Oracle, etc.) and its connection string are required by the context class function Object() { [native code] } parameter DbContextOptions. Let's now add the DevConnection connection string to appsettings.json.
Let's run the following migration commands one by one to create the actual physical database based on the connection string.
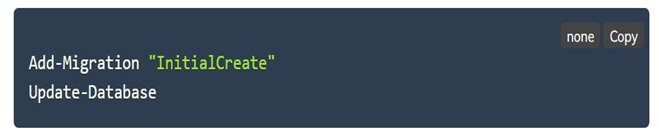
After the transfer is complete, you can check to see if the new database was created according to our DB model.


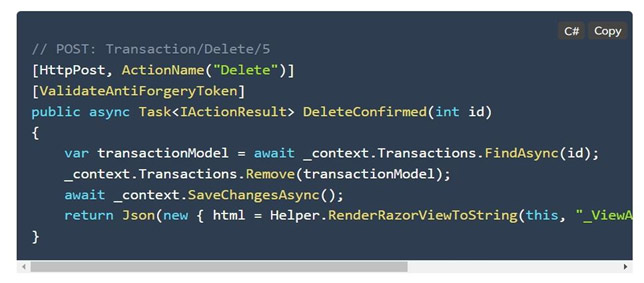 Now, in wwwroot/js/site.js, add the corresponding jQuery Ajax post method, jQueryAjaxDelete